

How To Add Trim To Windows
Hi everyone, I'm Cristina from Remodelando la Casa, and I'm beyond excited to join the team of Pretty Handy gals and guys! I'm withal pinching myself at such a wonderful opportunity.
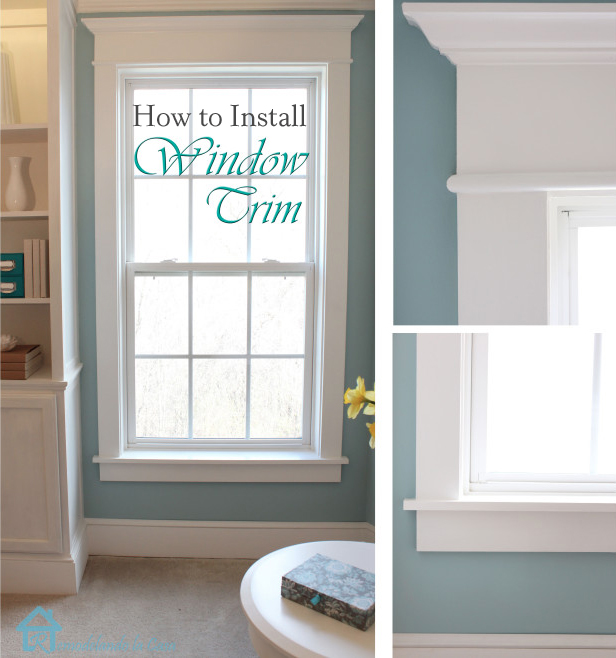
Today I'm going to show you a fairly easy way to transform your builder course windows from obviously and irksome to beautiful with loads of character and with a more finished appearance.
Right now I'chiliad working on updating my bedroom, where I have a couple of these windows.
They wait like they are wearing skirts, but forgot to put on the tops! 🙂 Yeap, naked!

Allow's alter that past dressing upward those windows!
This is only a decorative treatment. All the wooden material (Poplar or Pine), can be found at your local dwelling house center.
(A ffiliate links are included for your convenience. Brittany earns a minor per centum from a purchase using these links. There is no additional cost to you. You tin read more than near affiliate links here .)
Tools:
- Miter saw (but y'all can employ a Miter box and hand saw)
- Jig saw
- Sander
- Pneumatic nail gun
- Pry bar
- Utility knife
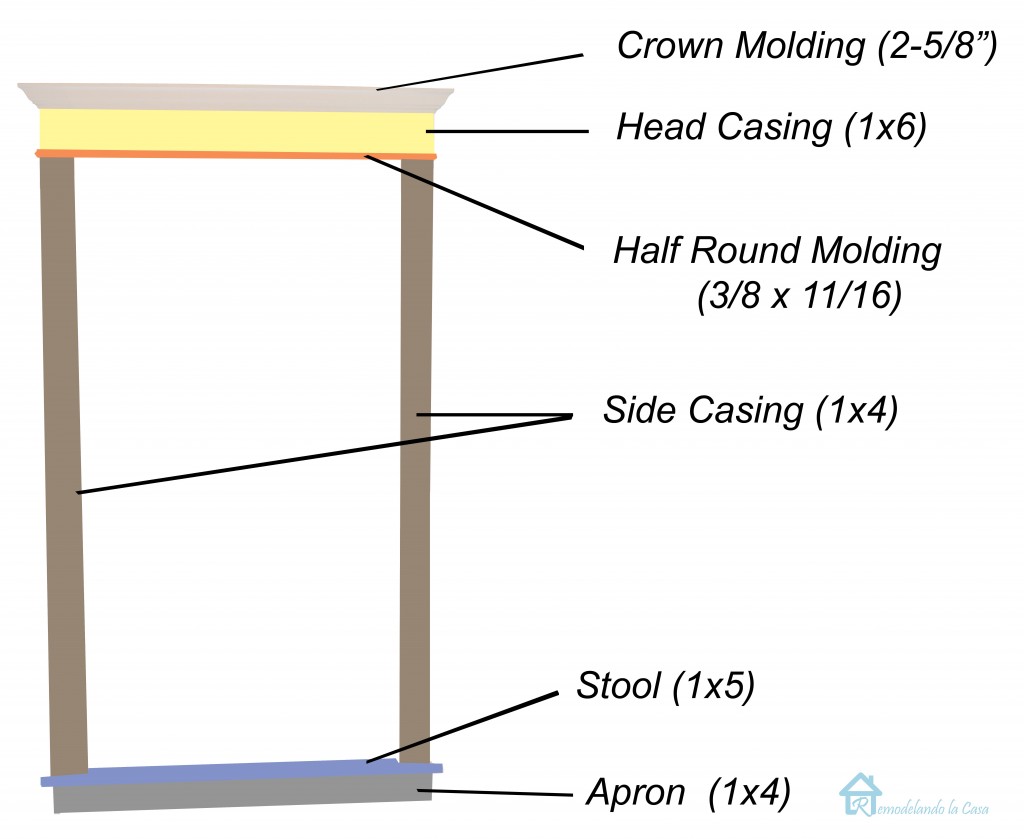
How much material yous need depends on the size of your window, but this is what I used:
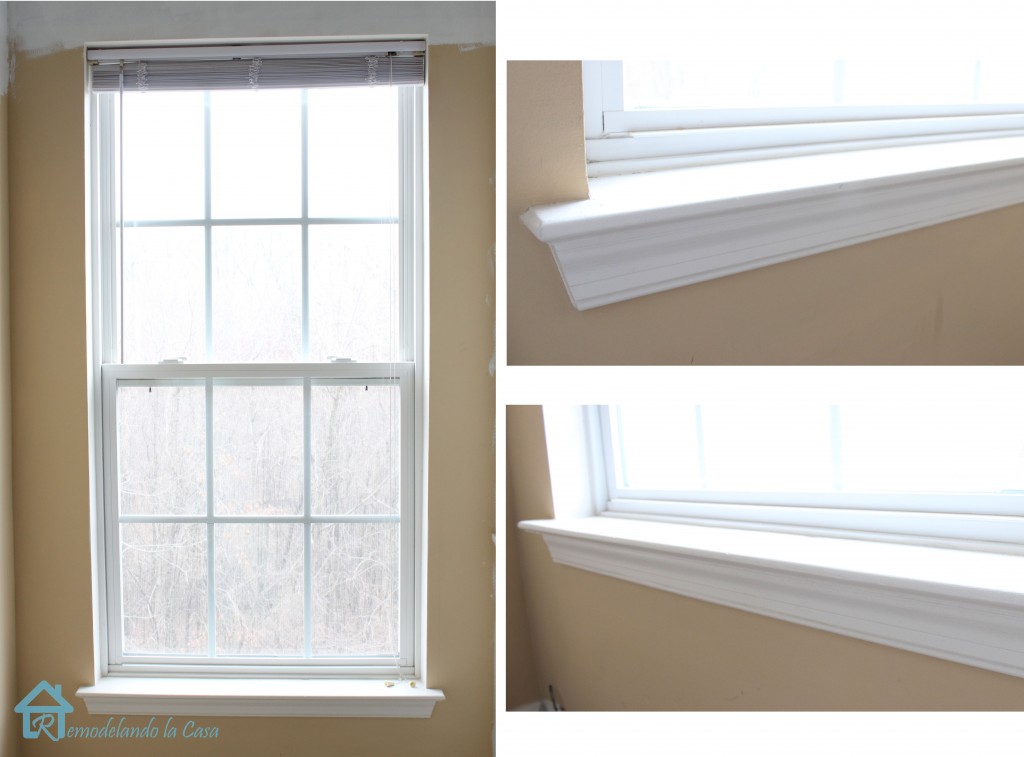
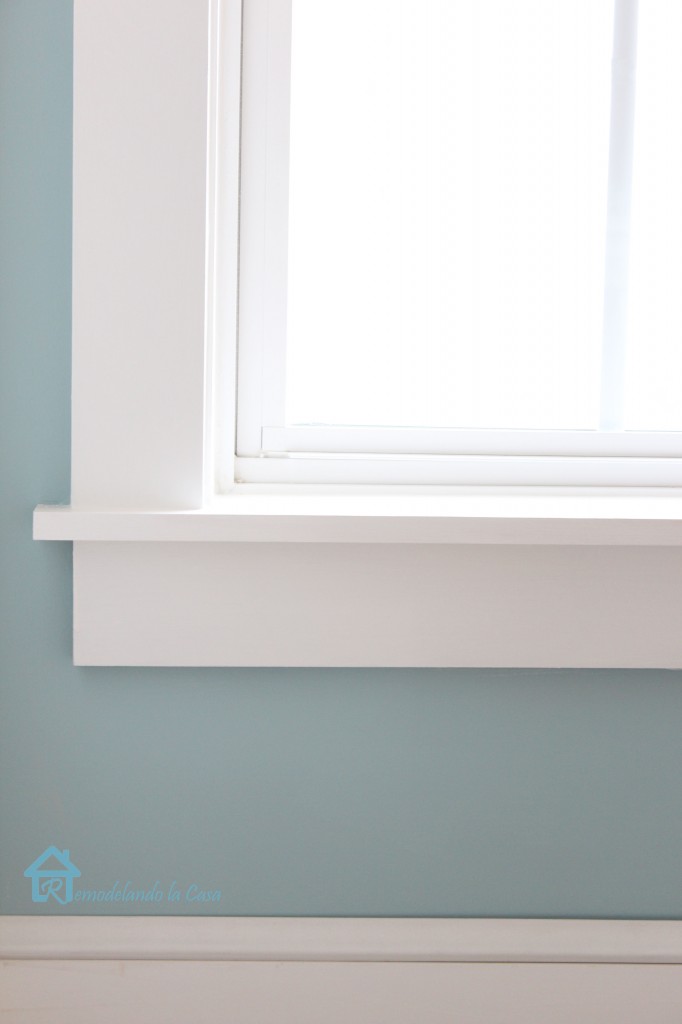
The first thing to practise is getting rid of the quondam window stool and apron.
Using the utility pocketknife, score around the window cut the caulking. This is very important to prevent rips in the drywall.

Using the pry bar begin lifting the apron, use a forest shim every bit back up to prevent impairment to the wall.
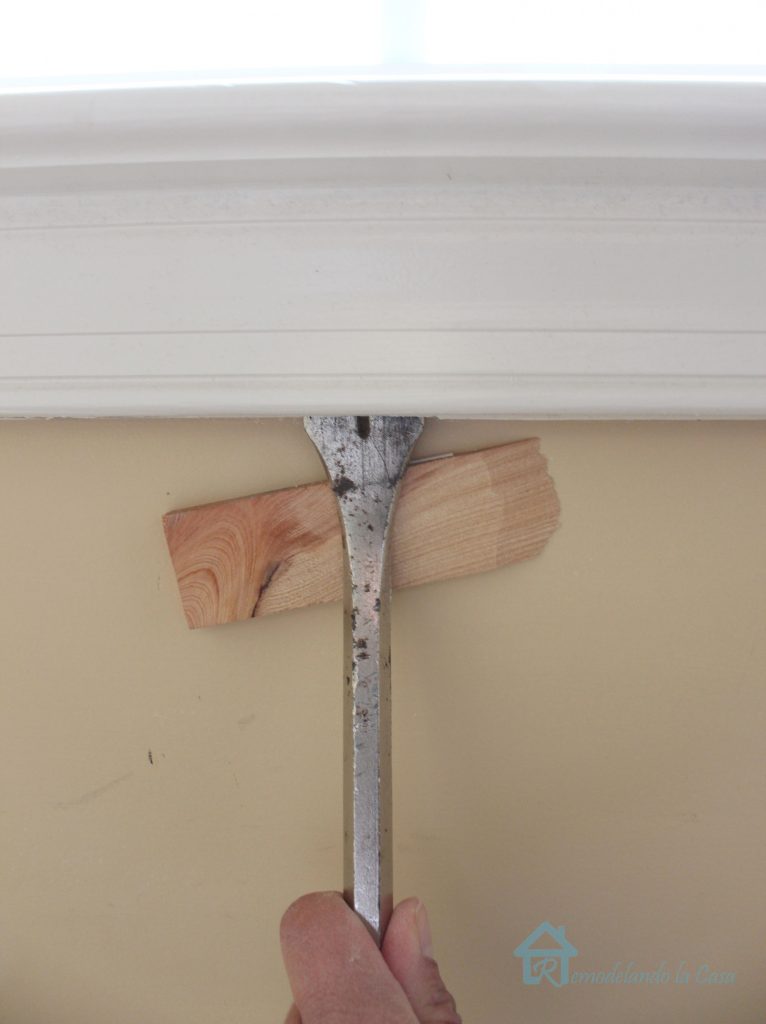
Once the apron is off, you can brainstorm lifting the stool.

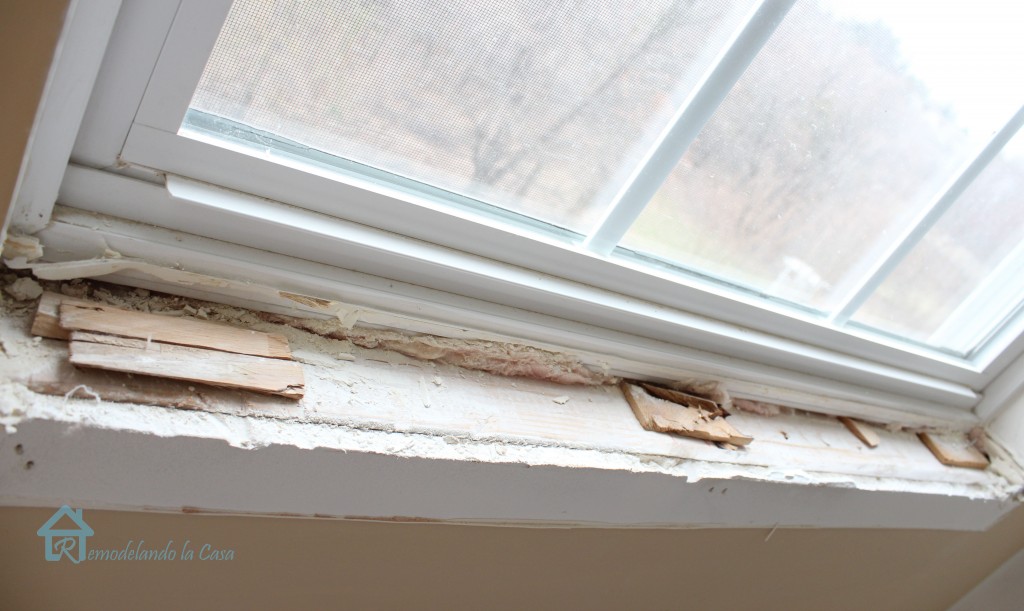
Underneath I found lots of forest shims that were used to level the stool. They were left in place. Scrape the old caulking from the window and wall.
Don't throw abroad the old window stool, yous tin use it to trace the blueprint onto your new stool. Measure the width of your window, add together the width of both side casings: 7 inches, add 1/ii″ for reveals (ane/4″ on each side) and add together 2 more inches for the "horns" (The horns are those extra parts on the window stool that go beyond the apron. Allow 1 inch on each side of the stool.)
Mark the heart on the old and new stool boards, align those centers and trace the new pattern.
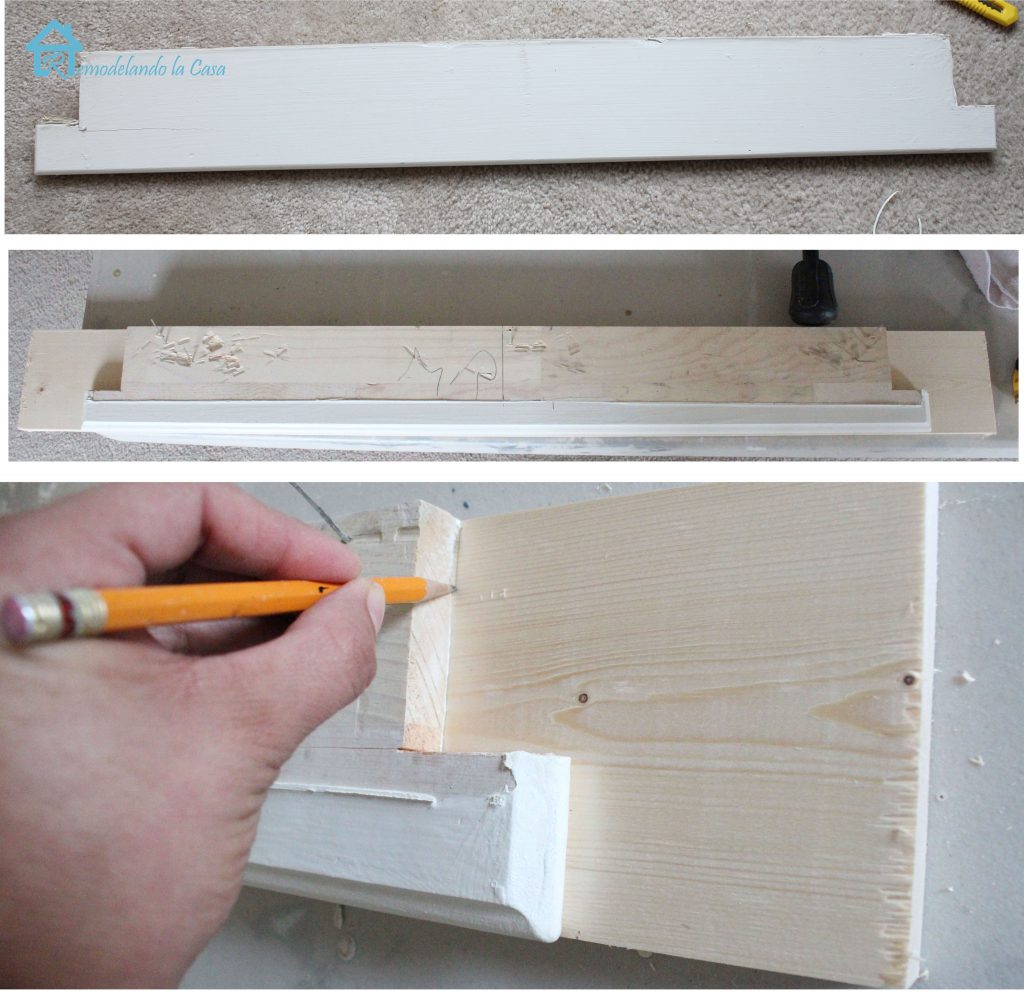
If you are working on more than than 1 window, it is a skillful idea to marking each board, even though they expect pretty much the same, their measurements tin vary.

Use your jig saw to cut away those marked ends.

Place information technology on the window and make certain the new stool is level. Nail information technology in place.
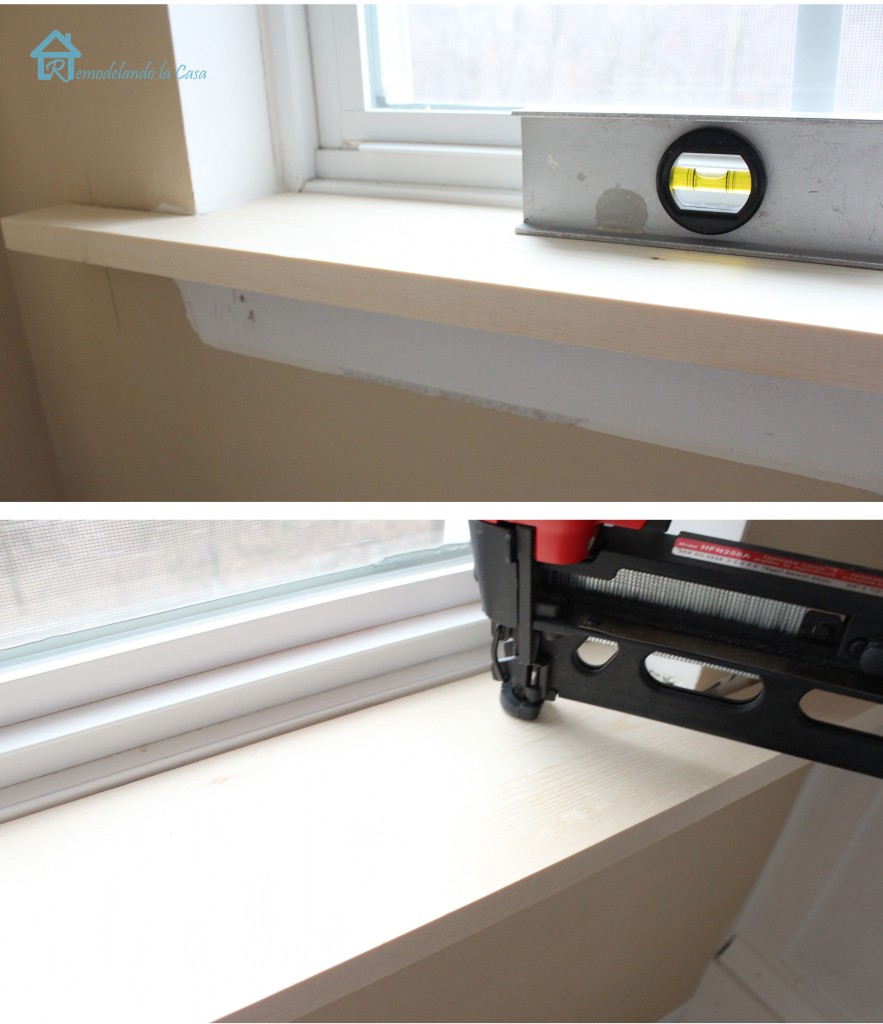
The frock can be installed by centering it underneath the stool. The dimensions are the same as for the stool, but without the horns (2″). As shown below, the horns protrude an inch on each side beyond the apron.

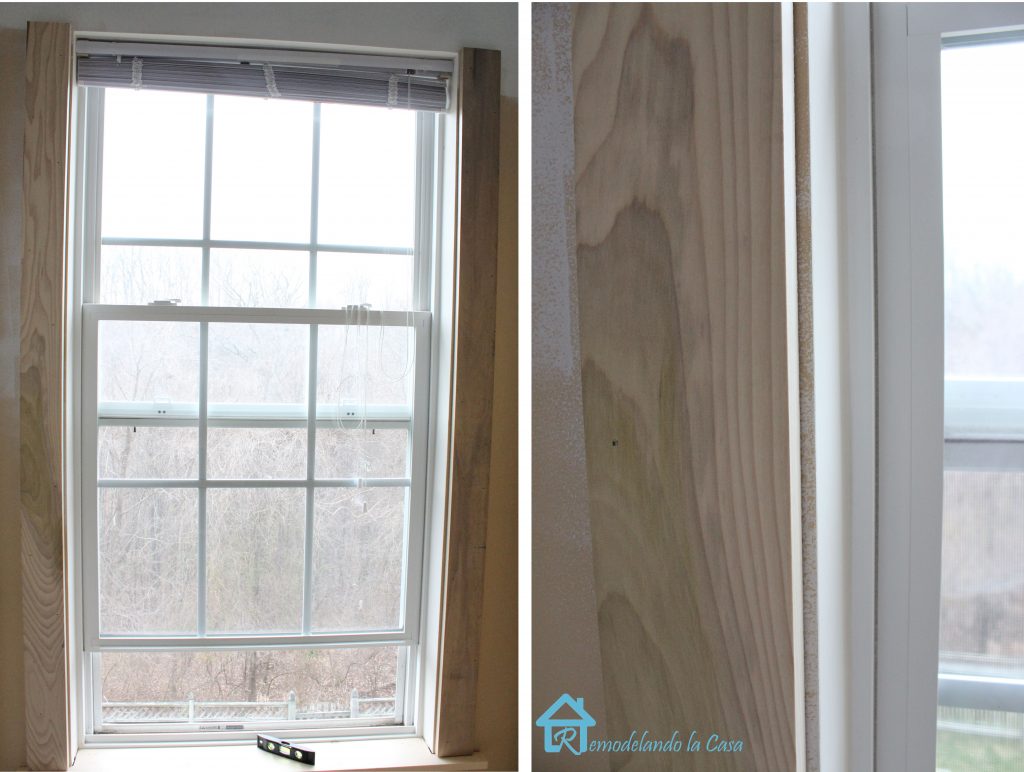
The side casings tin can exist installed now. To figure the length of the side casings, measure out the distance from the stool to the summit of the opening of the window, add ane/4″ for reveal line. Secure the side casings with nails.
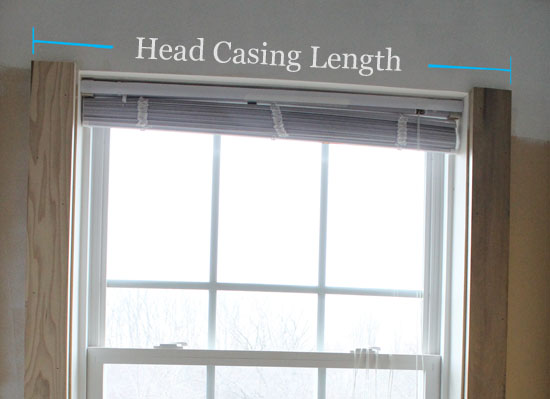
After the side casings are installed, measure the distance from the outer edges of the side casings. That volition give yous the caput casing length.
Nail the head casing in identify.

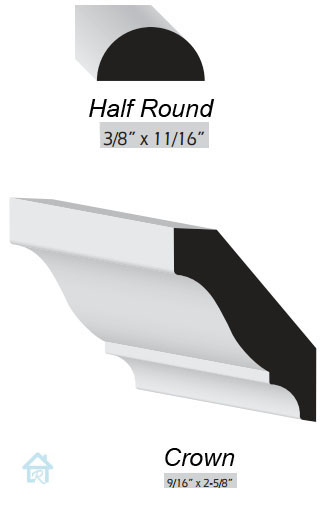
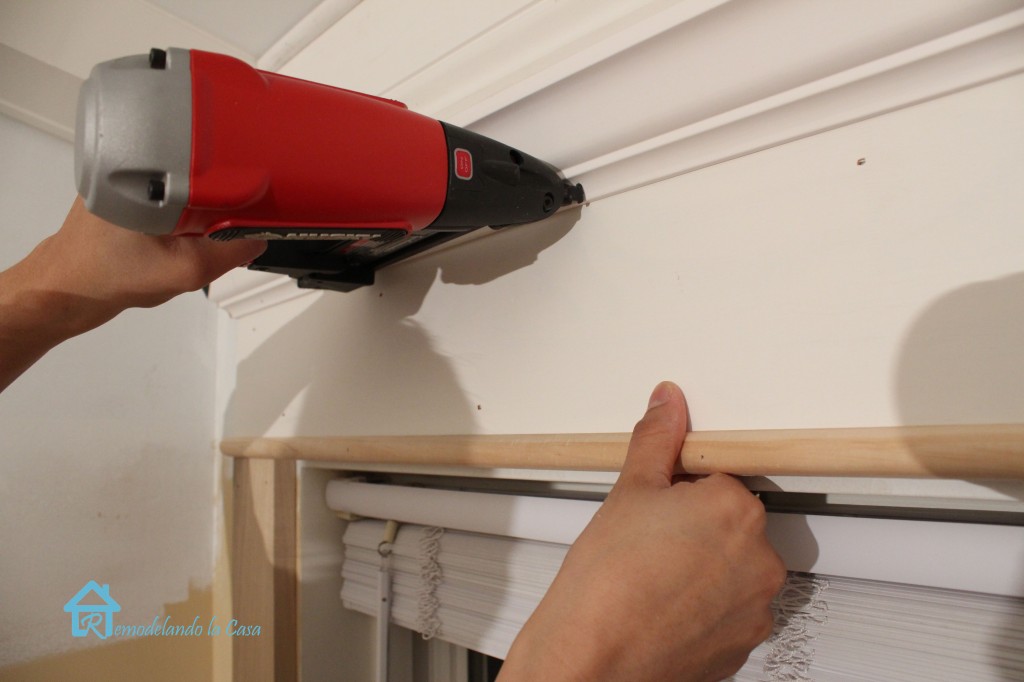
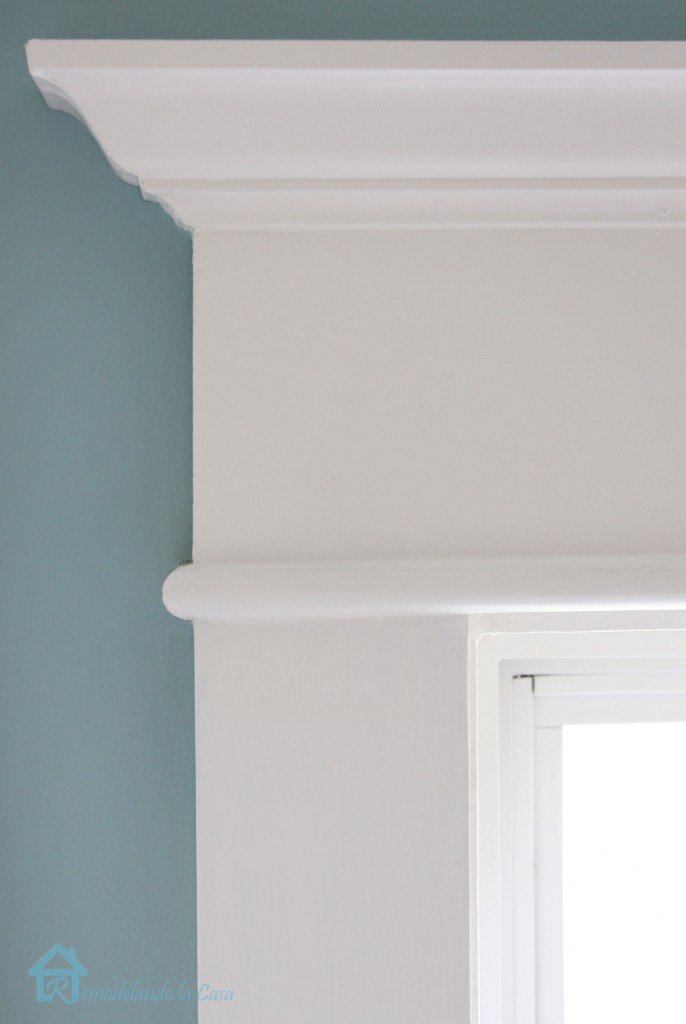
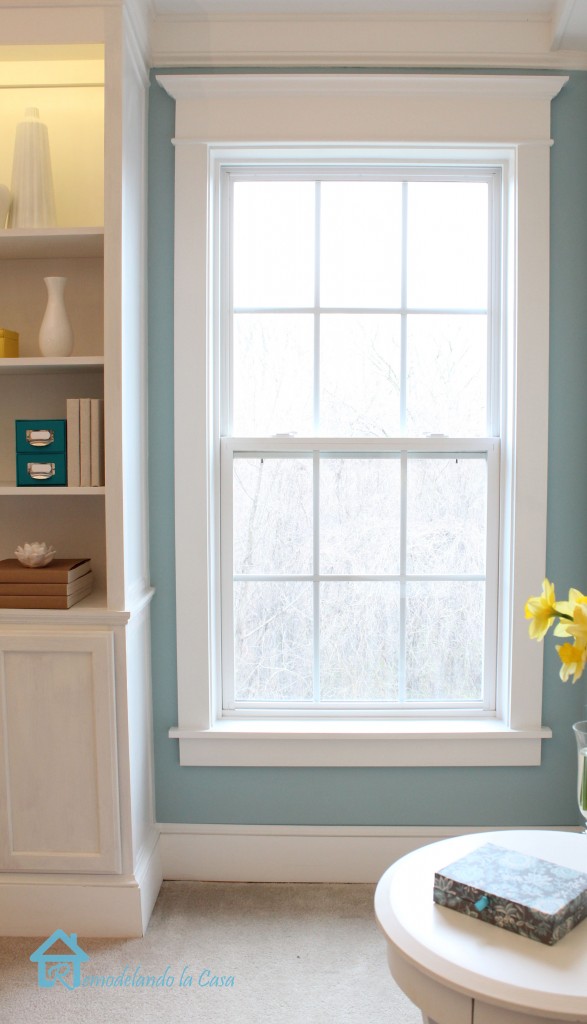
Cut the decorative molding, crown and one-half round.

When cutting the decorative molding, miter the ends (cut at a 45 degree angle as shown below.) Remember to cut the molding upside down.

The crown is installed at the very meridian of the caput casing and the half round is attached to the lesser of the caput casing.
The returns (side pieces of the decorative molding) are glued in place and held overnight with record.

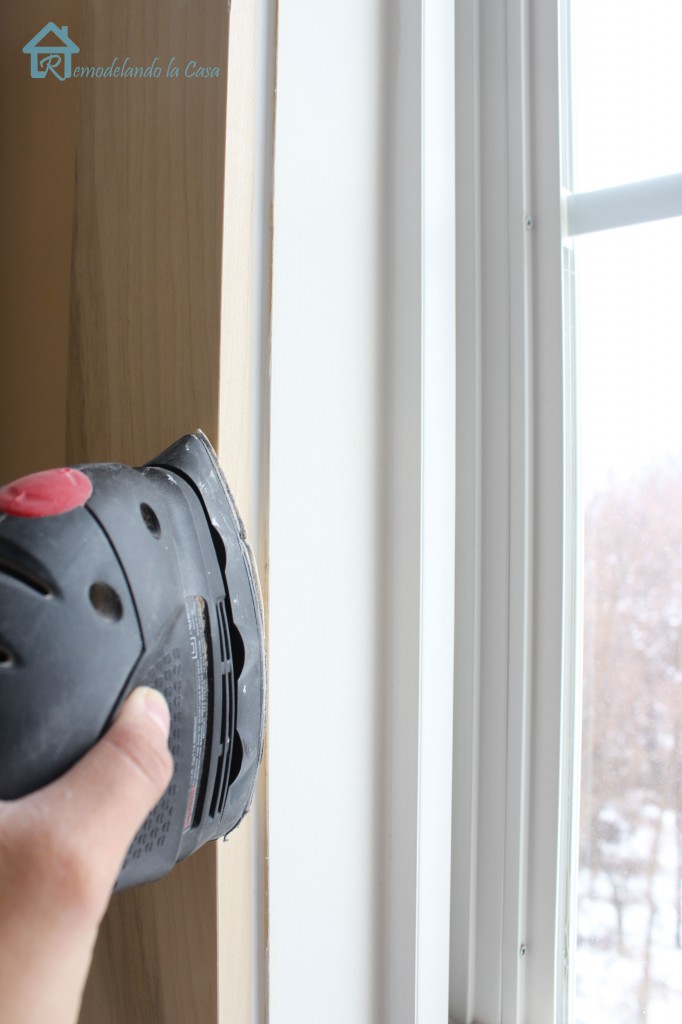
Fill the nail holes and gaps with caulking. Later on the caulk is dry out, a good sanding is a necessity. Don't forget to sand those sharp edges besides.
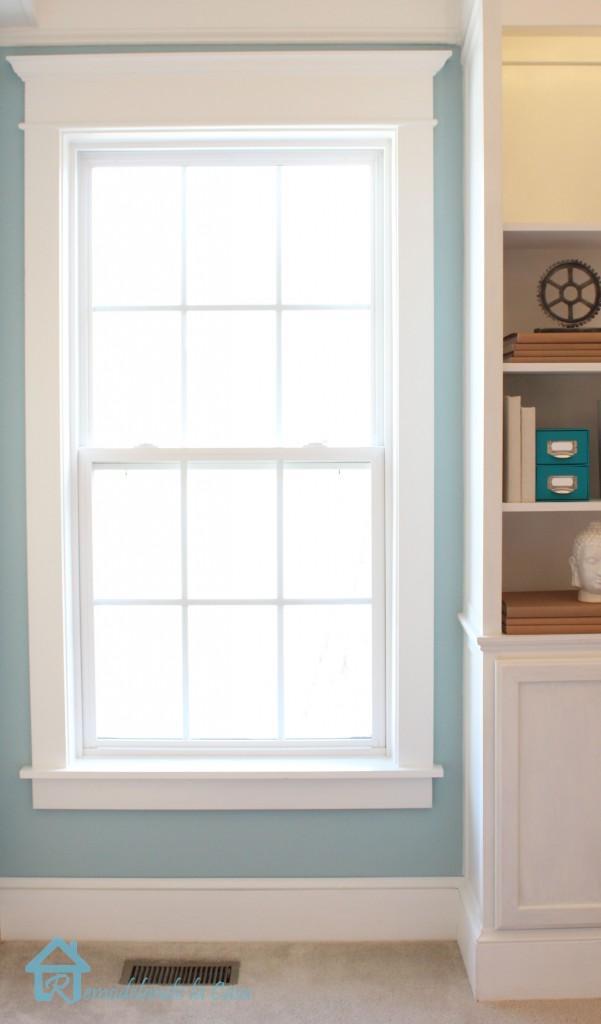
Paint the trim with ane coat of primer and two coats of paint. Then you lot'll accept proficient looking windows in your room!
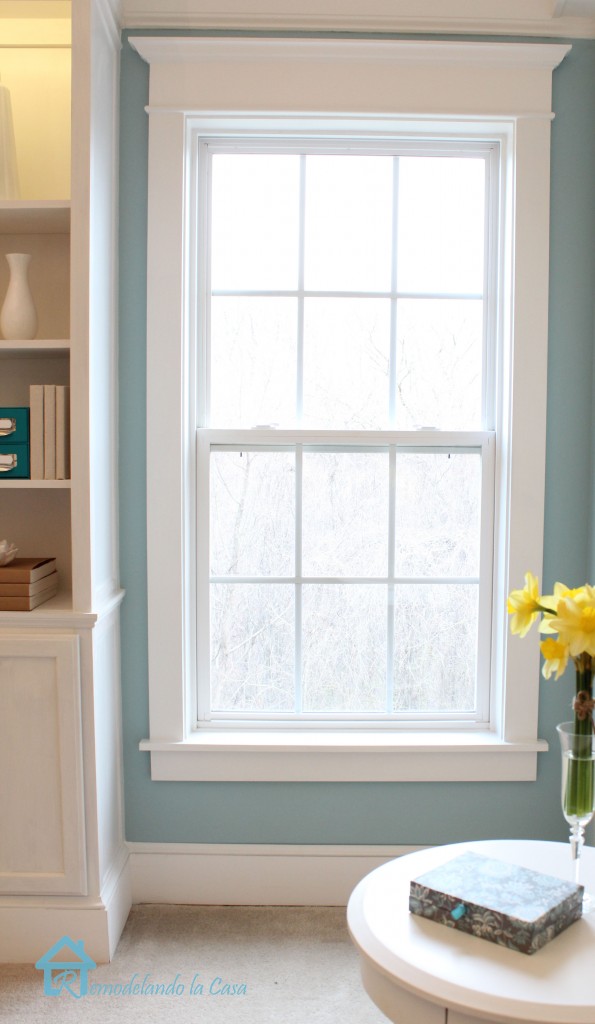
Add together new paint in a contrasting colour on the walls and the room is well-nigh ready!
I had some leftover paint that I mixed to achieve this hue.
These twin windows actually add together a lot of character to the room.
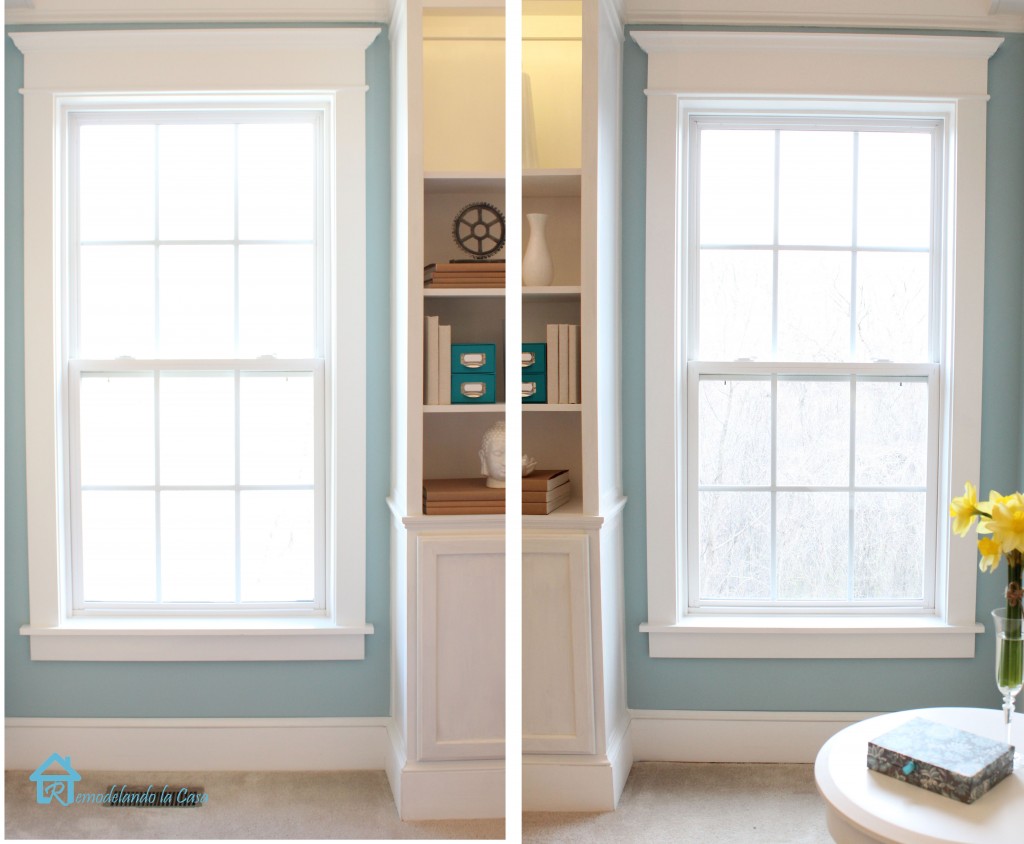
The trim makes a big deviation, wouldn't yous concur?
Thank yous so much for having me here at Pretty Handy Girl! I tin't expect to share more than with you!
~ Learn more virtually Cristina~
Don't miss Brittany's great tutorial for trimming a casement window:How to Install Trim and Casing Moulding on a Casement Window past PrettyHandyGirl
Source: https://www.prettyhandygirl.com/window_trim_how_to_tutorial/
Posted by: borgespries1980.blogspot.com
0 Response to "How To Add Trim To Windows"
Post a Comment